Table of content
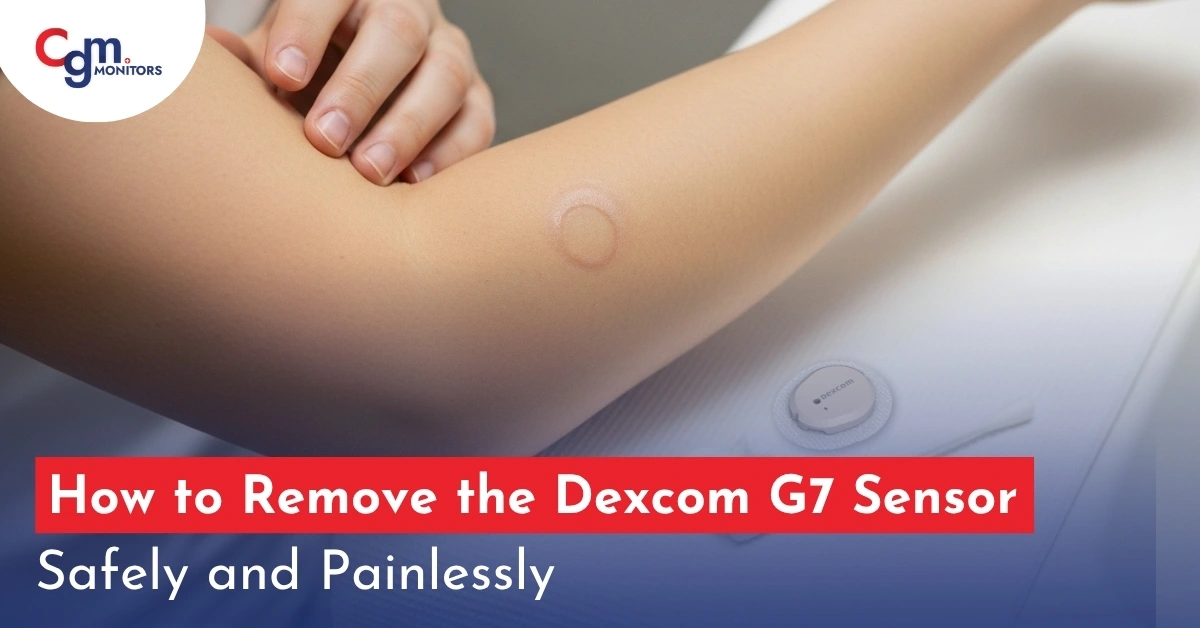
If you are managing your diabetes by using sensors, you know how vital the Dexcom G7 sensor is for real-time blood sugar sensor insights. But when it’s time for Dexcom G7 sensor replacement, the process can feel a bit daunting because many users reported that while removing the sensor, bleeding occur. It occurs when you re in hurry or you use it more than its weartime.
Don’t worry — we listen to your problems and take action right away. Here is the complete guide on how to remove Dexcom G7 sensor in a way that’s straightforward, painless, and safe for you. We will also cover everything from preparation to aftercare, drawing on official guidelines and user tips like detailed irritation prevention and site rotation strategies.
Importance of Proper G7 Sensor Removal
Reasons to Pay Attention:
- To minimize skin trauma or irritation
- To avoid pulling on the sensor filament or adhesive in a way that could cause bleeding and brusing.
- To ensure your site is ready for the next sensor replacement.
- To maintain accurate readings and avoid sensor site fatigue or skin issues that might degrade monitoring performance.
In short, proper removal gives you a better user experience, healthier skin, and reliable monitoring
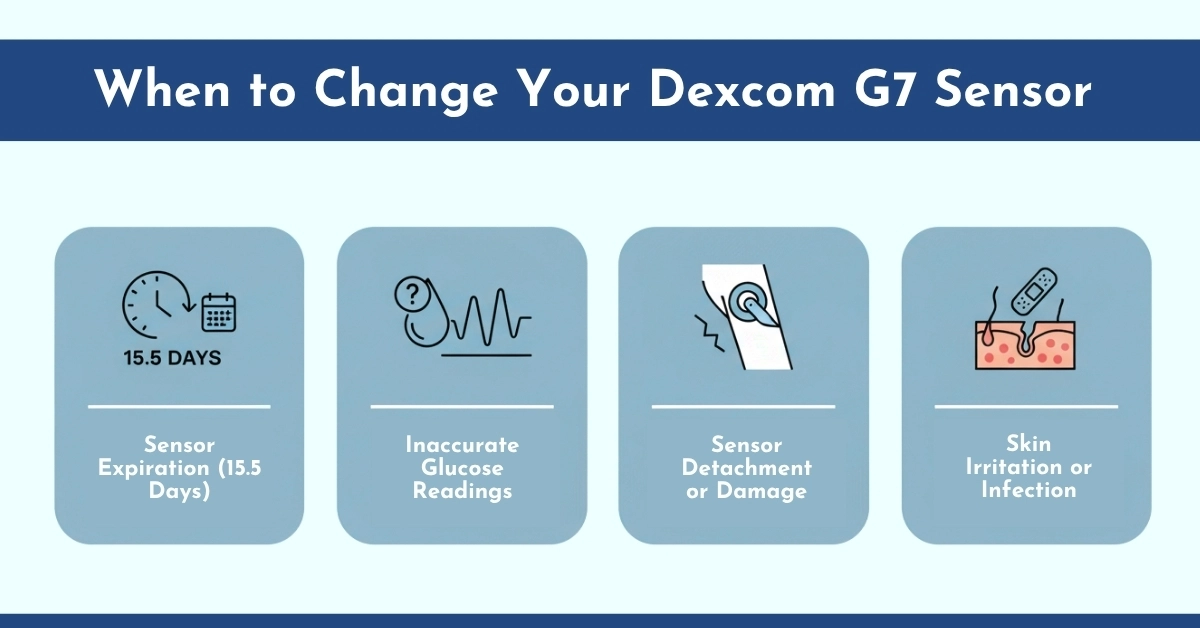
When to Change Your Dexcom G7 Sensor
Knowing when to replace your sensor is essential for reliable monitoring:
- Typical wear: 15 days for a newer version, marking it as the longest-lasting CGM sensor available
- Grace period: up to 12 hours, depending on your device and region.
- Dexcom app or G7 receiver will alert you when the session is ending.
- If your glucose readings seem inconsistent with your fingerstick tests or fluctuate abnormally, it may indicate the sensor is no longer working properly.
- If the adhesive peels, the sensor falls off, or the site gets irritated, replace it immediately.
- Redness, swelling, or itching around the sensor site can signal irritation or infection—remove and replace the sensor at a new location.
Tip: You have to know very well about the FDA Approved sites for Dexcom G7 replacement for better managing of glucose monitoring. Moreover it is recommended to always rotate sites to prevent irritation and allow skin recovery.
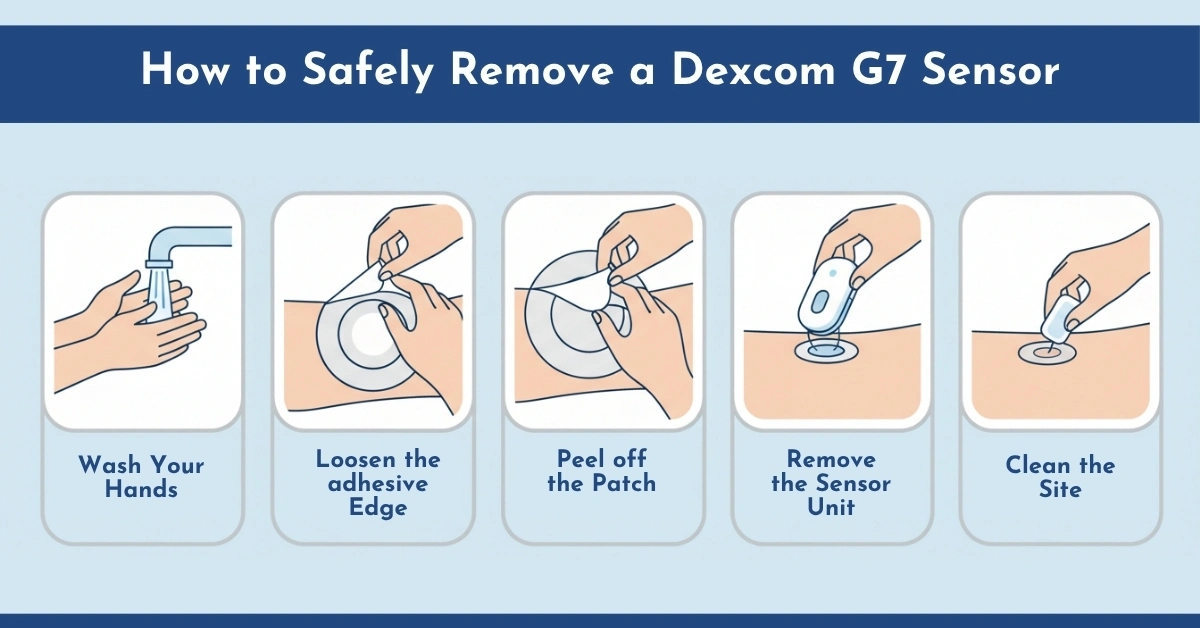
How to Safely Remove a Dexcom G7 Sensor: Step-by-Step
Now, let’s get started with the steps that how to remove Dexcom G7 sensor. Follow these Dexcom G7 sensor removal steps for a smooth experience:
Step 1: Wash Your Hands:
- Begin with thorough hand washing to keep the area free from bacterial or other infection.
Step 2: Loosen the adhesive Edge
- Find one edge of the adhesive patch (it might be easier if you fold back a corner).
- Apply baby oil or a dedicated G7 sensor adhesive remover around the sensor patch.
- Let it soak for 5-10 minutes.
- This softens the adhesive, making G7 sensor patch removal easier and reducing pull on your skin.
- Use compatible adhesive patches to protect the sensor site and surrounding skin.
Step 3: Peel off the patch like a bandage
- Start at one edge, using your fingernail to lift.
- Pull slowly and steadily in the direction of hair growth. Peel slowly like a bandage, folding the patch over itself
- While doing this, use your other hand to push down on the skin away from the adhesive. This “push and peel” method minimizes pain.
- If you meet strong resistance, pause, apply more oil, or wipe under the edge, then resume slowly.
Step 4: Remove the sensor unit:
- Once the adhesive is lifted, you can remove the sensor transmitter unit (if applicable) according to your system’s instructions.
- Make sure you’re not pulling any sensor wire still embedded in the skin.
- If you feel unusual resistance, stop and consult your healthcare provider.
Step 5: Clean the site
- Wash the site gently with soap and water or use an alcohol-free wipe if you have sensitive skin.
- Remove any residual adhesive using a soft cloth soaked in oil or adhesive remover.
- Pat the area dry with a clean towel.
Optional Support: If you have a Dexcom G7 Starter Kit, which is available on CGM monitors, you can also check that your sensor insertion site is clean before placing a new sensor.
Tip for hairy areas: “If you’re on the hairy side, shave that area of skin before applying the sensor because when you don’t do this, it will become so painful when you remove the sensor.”
What to Do After Removing the Sensor: After-Care Checklist
After removal, here’s a checklist to ensure your skin is happy and your next sensor is ready:
| Task | Why it matters |
| Clean the area of residual adhesive | Prevents irritation or dermatitis before next insertion. |
| Inspect skin for bruising, redness, or rash | If significant, choose a new site or wait until the skin heals. |
| Apply moisturizer if needed | Keeps skin healthy and ready for the next sensor. |
| Remove old sensor from paired devices (Bluetooth) | Prevents confusion with your app when you apply the next sensor. |
| Choose your next site and prep it | Good prep = better adhesion + easier removal next time. |
| Properly dispose of the used sensor | Prevents contamination or accidental injury. |
Some patients complaint about the adhesive materials that cause felling of sensor before time so that’s why we recommend Best Adhesive Patches for Dexcom G7 (Cut and without cut option)at Cgm Monitors.
Conclusion:
Mastering how to remove Dexcom G7 sensor is about more than steps; it’s about comfort, safety, and empowerment in your diabetes management. Removing your Dexcom G7 sensor doesn’t have to be stressful. With a little preparation, the right technique, and after-care, you can transition from one sensor to the next smoothly and comfortably. Your skin will thank you, your next sensor will perform better, and you’ll stay on top of your diabetes monitoring with less difficulty. At CGM Monitors, we offer a range of devices, sensors, and accessories to suit every lifestyle.
Disclaimer:
This content is meant for informational purposes only and is not a replacement for professional medical guidance. Some visuals in this article are digitally generated for demonstration purposes only.
Frequently Asked Questions
Can I reuse a Dexcom G7 Sensor?
No, it’s single-use to avoid errors or infections. Some unofficial hacks exist, but they’re not recommended for safety.
Does sensor removal hurt?
Slight discomfort may occur, but most users report minimal pain.
How often do I change the Dexcom G7 sensor?
Every 10 days, as per manufacturer guidelines.
What if I have skin irritation or redness at the removal site?
Clean gently, use a new site, or apply barrier patches; consult a healthcare provider if persistent.
Can I switch the sensor site immediately? Same spot?
It’s best to rotate sites; avoid reusing the exact spot to prevent irritation.


Is it necessary to remove sensor prior to having MRI?
Yes, most sensors must be removed before an MRI.
The powerful magnets in the MRI machine can damage the sensor’s electronics, cause skin burns, or lead to inaccurate readings.