


Introduction
Product Overview
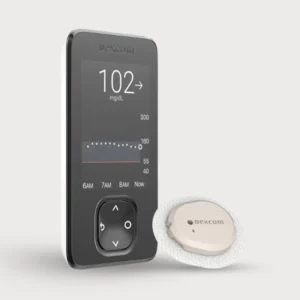
The Guardian 4 sensor is a part of the latest Guardian Continuous Glucose Monitoring (CGM) system, which is used to manage diabetes more effectively. It functions by changing minute levels of glucose from the interstitial fluid beneath the skin into an electronic signal. It is utilized to offer real-time glucose data. This sophisticated system provides glucose values in real-time to facilitate improved diabetes management.
Unlike traditional blood glucose monitoring systems, the Guardian 4 CGM provides continuous data updates, ensuring you stay informed about your glucose trends throughout the day. Compatible with the Guardian 4 Transmitter Kit and designed for effortless integration into Medtronic insulin pump systems. Moreover, it also helps users take control of diabetes management with confidence and comfort.
Indications for Use:
The Guardian 4 Sensor (MMT-7040) is designed specifically for patients seven years and older to track glucose levels for diabetes care.
- Single-use, disposable sensor for up to 7 days of continuous wear
- Prescription-only medical device recommended by a certified healthcare professional
- Intended as an adjunctive device, to supplement — not replace — standard blood glucose monitoring
- For accurate readings and safe use, always follow the Guardian 4 System User Guide.
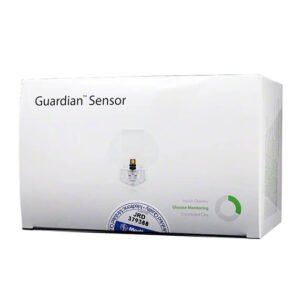
Medtronic Guardian 4 Sensor Kit Components:
- One-press serter (MMT-7512): Disposable insertion device.
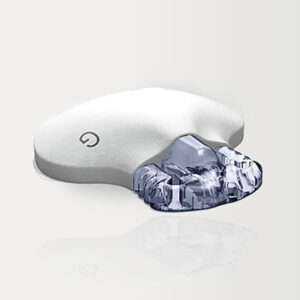
- Glucose sensor assembly: Includes pedestal, needle housing, sensor filament, and clear liner.
- Sensor base: Includes sensor connector and snaps for transmitter attachment.
- Two pieces of oval adhesive tape: For securing the sensor base and transmitter (each with protective liners).
Note: The Guardian 4 transmitter is sold separately and attaches to the sensor base after insertion.
Where to Insert the Guardian 4 Sensor:
Choosing the correct insertion point is important for optimal sensor glucose performance. Choose a site with sufficient subcutaneous fat and avoid muscle, scar tissue, or hard skin sites.
- 7-17 years of age: Upper back of arm
- 18 years of age and above: Upper back of arm
Tips for best performance:
- Avoid areas with scar tissue, muscle, or excessive movement.
- Choose sites with sufficient subcutaneous fat.
- Avoid clothing-restricted areas and excessive motion zones.
How to Insert the Guardian 4 Sensor:
1. Prepare the Site of Insertion:
Wash hands thoroughly using soap and water. Select an appropriate site with adequate subcutaneous fat and disinfect the site using alcohol. Let the area air dry.
2. Prepare the Sensor:
Open the package of the sensor, take out the glucose sensor assembly, and position the pedestal on a clean flat surface such as a table. Make sure adhesive tab is folded under the sensor connector and sensor snaps.
3. Using the Serter:
Grip the serter with one hand, ensuring your fingers don’t touch the buttons. Push the serter down onto the pedestal until it clicks. With two fingers on the base of the pedestal, pull the serter upwards.
4. Insert the Sensor:
Position the serter on the prepared site of insertion. Press and release both buttons on the serter simultaneously. Keep the serter in position for a minimum of five seconds to allow the adhesive to adhere to the skin.
5. Securing the Adhesive:
Lift the serter off without pressing the buttons. Take off the adhesive liner from beneath the adhesive pad, hugging the skin closely. Press the adhesive pad tightly against the skin so that the sensor will remain in position.
6. Place the Transmitter:
Straighten the sensor adhesive tab flat against the skin. Remove the liners labeled “1” and “2” and apply the tape as directed, pressing firmly. Secure the transmitter to the sensor and verify a flashing green light. If the light fails to flash, see the troubleshooting section of the Guardian 4 transmitter user guide. Lastly, cover the transmitter with the adhesive tab.
MiniMed Guardian Sensor 4 Features:
High Accuracy: Medtronic’s most accurate sensor with a MARD rating of 8.7% when used with the CONTOUR®NEXT LINK 2.4 Meter.
- Easy Insertion: Simple and convenient insertion process.
- Flexible Design: Designed to move with your body for maximum comfort.
- Real-time Glucose Monitoring: Provides continuous updates on your glucose levels and trends.
Additional Information
- The Guardian 4 sensor is for prescription use only and offers real-time glucose monitoring for seven days.
- Make sure you read all the instructions and safety precautions in the user guide to achieve the best results.
How to Remove the Guardian 4 Sensor
- Detach the Transmitter as described in the Guardian 4 transmitter guide.
- Gently peel off the sensor from the skin.
- Dispose responsibly in a sharps container.
Why Choose the Medtronic Guardian 4 Sensor
The Guardian 4 Glucose Sensor represents Medtronic’s most advanced CGM technology. It offers faster updates, higher accuracy, and easier setup compared to previous generations.
Ideal for individuals seeking real-time, continuous diabetes insights, the Guardian 4 sensor empowers users with data that helps optimize therapy decisions and reduce time spent in hypo- or hyperglycemia.
Whether you’re considering Medtronic Guardian 4 CGM or exploring hybrid systems like the iLet Bionic Pancreas, this sensor ensures you’re equipped for next-level glucose management.
Warnings & Precautions
- Use only the Medtronic One-Press Serter (MMT-7512) for insertion.
- Never reuse the sensor — doing so may lead to inaccurate results or infection.
- Clean hands thoroughly before handling the sensor.
- Avoid inserting through tape or on irritated skin.
- Rotate insertion sites to maintain skin health.
- Do not attempt to clean or re-sterilize used sensors or needles.
Related products


Reviews
There are no reviews yet.