Table of content
Introduction
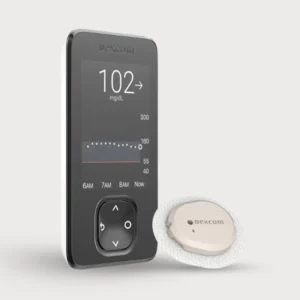
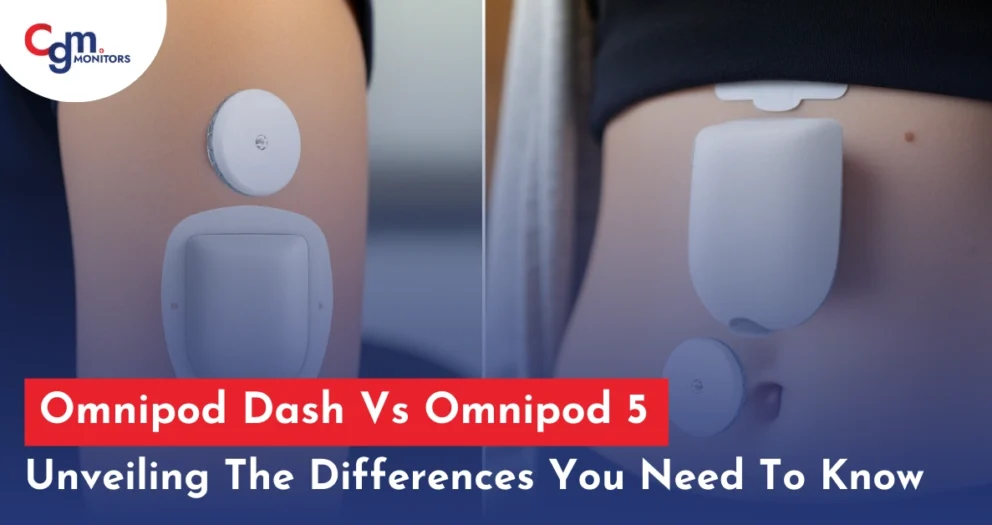
For diabetes management, technology has made important progresses in recent years. One such revolution is the Omnipod, a tubeless insulin pump that offers flexibility and independence to individuals with diabetes. The Omnipod system contains a minor pod-like device that diabetic patient wear on their body and delivers insulin continuously during the day.
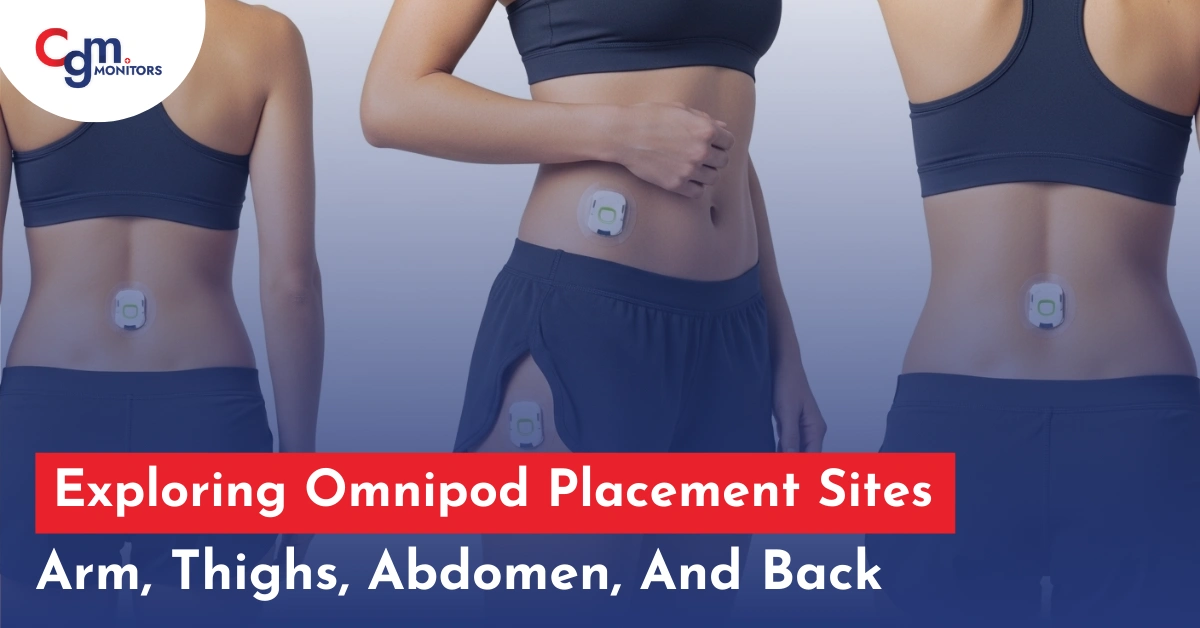
A significant attention for users is to wear appropriate Omnipod placement sites on their bodies. This article intends to explore the various Omnipod sites, which include the thighs, arms, abdomen, and back.
Best FDA-Approved Omnipod Site Locations
To understand the workings of Omnipod, you should know the importance of selecting the right placement site for this device. For choosing the accurate placement site for the Omnipod, there are numerous important tips to ponder.
They can deliver valued guidance created on your lifestyle, needs, and medical considerations.
To avoid the expansion of scar skin irritations, tissue, and uneven insulin absorption, it is vital to alternate your Omnipod placement sites regularly. Rotate between different areas within a selected site and rotate it between different sites on your body.
Before the application of the Omnipod 5, wisely examine the selected site for any signs of infection, irritation, or injury.
Confirm the skin is undamaged, free from cuts, clean, rashes, or bruises. Avoid areas with scars, moles, or tattoos, as they may disturb the pod’s adherence or sensor precision.
1. Back of Arms (Upper Arms)
Placing the Omnipod on arm offers several advantages. Firstly, it provides easy access for monitoring and adjustments since the arm is a readily accessible area. Moreover, arm location allows for discretion, as the pod can be easily covered under clothing.
This can be mainly helpful for individuals who desire to keep their diabetes management private or who wear clothing that reveals other areas of the body.
Tips for arm placement:
- Avoid areas near the shoulder joint or bony areas.
- Rotate sites with each pod change to prevent skin irritation.
- Make sure the area is clean, dry, and free from lotions or oils.
Note: Although arm placement suggests suitability and discretion, there are a few attentions to keep in mind. The arm may not be the most steady location for the Omnipod 5 placement, particularly for individuals who are involved in hard physical activities or sports.
2. Thighs (Outer Upper Region)
The thighs provide another option for Omnipod placement. Placing the device on the thighs can offer increased stability and reduced interference during physical activities. The thigh area also tends to be less affected by external factors such as friction from clothing or tight spaces.
While thigh placement offers stability, it may be less discreet compared to other options. The Omnipod might be more visible on the thighs, depending on the clothing worn,
Individuals who regularly dress in shorts or skirts may want to study the impact on their chosen fashion choices. Furthermore, if you have restricted flexibility or movement in your thighs, removing and inserting the pod might be more challenging.
Where to Put Omnipod on Legs?
For your proper Omnipod pod placement on the legs, the most comfortable places are the upper thighs. It is recommended to place it specifically in the lateral thigh or front anterior thigh in the fatty area midway between your hip and knee. If we talk about the exact region, it is about 4–6 inches below the hip crease, where you can easily pinch an inch of skin.
Place it vertically (straight up-and-down) or at a slight angle so it sits flat and stays secure during walking, sitting, or exercise. Most importantly, keep it at least 1 inch (2.5 cm) away from your previous pod site, and avoid bony spots, inner thigh folds, or areas that rub against pants seams.
How to Put Omnipod on Legs – Quick Steps
- Choose Spot: Upper back or shoulder blade area, avoid spine and bony areas. (midway between hip and knee where you can pinch 1 inch of soft skin)
- Clean Skin: Wipe with alcohol, let it dry and shave any hair 24 hours before if needed.
- Prepare Pod: Fill with insulin and check cannula.
- Place Pod: Use a mirror or helper, hold perpendicular(90 degrees) to the skin.
- Insert & Stick: Activate via PDM, press firmly with the help of your palm for 10–15 seconds.
- Check Comfort: Move shoulders to ensure Pod stays secure.
Tips: Rotate sites, avoid tight clothing, and watch for irritation. Done in <60 seconds. Rotate sites every 3 days. Secure, hidden & perfect for walking/exercise! Always check with your educator.
3. Place Omnipod on the abdomen (Primary Site)
The abdomen is a generally chosen position for Omnipod placement due to its suitability and steadiness. Inserting the pod on the abdomen lets for easy access, making it simpler to insert and remove the device as desirable. The abdomen also offers a greater surface area, letting for more placement options and flexibility.
Although abdominal placement provides suitability, it might be less discreet, depending on your clothing choices. Additionally, individuals who have scars, stretch marks, or other skin conditions in the abdominal area may need to study how these factors might disturb pod adherence.
It’s significant to confirm that the selected placement site is free from irritation, as this can influence the efficiency of the device.
See also: Select the right Dexcom G7 Placement Sites.
4. Placement on the Back
The back is among the best Omnipod locations that offer unique benefits. Inserting the Omnipod on the back offers a high level of choice as it is easily covered by clothing. This option might be preferred by individuals who prioritize keeping their diabetes management confidential.
Moreover, back placement can be advantageous for those engaging in activities that involve lying down or sitting for extended periods, as it reduces discomfort caused by pressure on the pod.
While back placement offers discretion and comfort, it may be challenging for some individuals to reach the placement site independently. Assistance from a caregiver or partner might be required for insertion and removal.
Furthermore, if you engage in activities that involve wearing tight-fitting clothing or frequently leaning against surfaces, you should consider the impact on pod adherence.

Factors Affecting Omnipod Site Selection
Several personal factors influence which placement sites work best for your lifestyle and body type:
1. Body Composition Considerations
Individuals with lower body fat percentages may find fewer suitable placement options. Lean individuals should focus on areas with visible pinchable fat and may need to avoid sites where the cannula could reach muscle tissue.
2. Activity Level and Exercise
Athletes and highly active individuals should consider how their movements impact pod placement. Runners might avoid thigh placement, while swimmers may prefer the upper buttock area that’s less visible in swimwear. Choose sites that won’t be compressed during your typical exercises or sports activities
3. Clothing and Work Requirements
Your daily wardrobe influences ideal pod placement. Tight waistbands, belts, or compression clothing can affect pods placed on the abdomen. Professional dress codes may require more discreet placement on the upper arms or hips.
Omnipod Placement Tips for Sleepers
Follow these steps for optimum placement of omnipod during sleeping:
- Stick to the outer upper thigh on the side you don’t sleep on, because this can keep the pod away from your body weight and bedsheets all night.
- Place it vertically and a bit higher (about 6–8 inches below the hip bone, never too low near the knee) so nothing presses on it when you turn or lie on your side.
- Press the edges extra firmly for 20 seconds and add a small strip of medical tape over the top if you sweat or toss a lot; always test the spot for one full night first so you wake up with zero discomfort or alarms.
Common Omnipod Placement Problems with Solutions
Cannula pain or occlusion: Always pick the fattier middle-outer thigh and gently pinch the skin upward while activating (keep your heel flat on the floor). This gives the cannula a soft landing and cuts insertion pain by half.
Adhesion starts lifting: Double-clean with alcohol, let it dry 100% (wait 60 seconds), then swipe Skin-Tac or Mastisol if you run hot/sweaty — the pod will stay rock-solid for all 3 days.
Pod dislodges during walking or exercise: Never use inner thigh or near waistband; after sticking, wait 10 minutes then press all edges again with your palm. it locks in place even during runs or stairs.
Tips for the Suitable Use of Omnipod
Make the most of your Omnipod 5 with these key tips:
- Prep Your Skin: Clean and dry the recommended FDA-approved sites (abdomen, thighs, or upper arms) before Omnipod placement. Avoid lotions or oils for better adhesion; otherwise, it can fall.
- Rotate Sites: Regularly change the placement of your pods on your abdomen, thighs, or upper arms to reduce the risk of allergic reactions and lipohypertrophy.
- Choose Comfortable Spots: Use areas with enough subcutaneous fat, away from bones, scars, or stretch marks (not recommended by the FDA), for optimal insulin delivery.
- Keep Your Pods Secure: Avoid tight clothing and friction to ensure the Omnipod adhesive stays in place.
- Monitor Delivery: Check CGM readings and pod alerts regularly to confirm proper insulin infusion to prevent dangerous conditions like hypo and hyperglycemia.
If you have any issues related to the omnipod insertion to replacement, feel free to ask the CGM Monitors’ expert team.
Healthy Discussion: According to the Omnipod organization, Omnipod 5 sensor is now compatible with Dexcom G7 and FreeStyle libre 2 Plus. Both variation of Intro Kit are available on our web store.
Buy Omnipod 5 G6 Intro Kit
After understanding the Omnipod 5 placement sites on your body, you can apply it without much discomfort. For this purpose, you can buy an Omnipod 5 G6 Intro kit (a feasible insulin delivery system) from us.
At CGM Monitors, we provide you with top-notch and original diabetic devices. You can also buy other insulin pumps such as Mini Med Medtronic 680g from us.
Conclusion
Successful Omnipod placement requires understanding your body, lifestyle, and individual response to different sites. The approved placement areas—abdomen, upper arms, upper buttocks, and thighs—each offer unique advantages depending on your personal circumstances.
Consistent site rotation prevents skin complications and maintains reliable insulin absorption over time. Pay attention to how your glucose levels respond to different placements and adjust your strategy accordingly. Don’t hesitate to experiment within the approved sites to discover your most comfortable and effective locations.
Frequently Asked Questions
Can I put my Omnipod on my leg?
Yes, the outer part of your thigh is a good place for insertion. It contains sufficient fat, absorbs insulin effectively, and can be easier to reach than other areas. It is recommended not to wear tight jeans or anything else that obstructs the sensor from its position.
Where can I put my omnipod 5 on my body?
You can place your Omnipod 5 on areas with enough fatty tissue, such as the abdomen, upper buttocks, or outer upper arm.
Can you put an Omnipod on the front of your arm?
You can place it on the outer upper arm, but not the inner or bony parts. For the Pod, you don’t need to pinch the skin like in an old finger-prick glucometer; the device inserts automatically.
Can you wear an Omnipod on your abdomen?
Absolutely! The abdomen is the most common and preferred site. Just make sure it’s not too close to your belly button, scars, or moles. It will hurt you.
What are the 4 injection sites for insulin pen?
For insulin pens, the four main areas are the abdomen, thighs, outer upper arms, and upper buttocks. Always rotate within these areas to prevent allergic reactions.
How to keep an Omnipod from falling off?
Always clean and dry your skin before placement, use CGM Monitors’ best omnipod 5 overlay patches, and avoid lotions, oils, or sweat on the site.
How often should I rotate the Omnipod placement sites?
It is crucial to rotate your Omnipod placement sites regularly to prevent the development of scar tissue, skin irritations, and uneven insulin absorption. Rotate between different areas within a chosen site and alternate between different sites on your body.
What should I consider before applying for the Omnipod?
Before applying the Omnipod, carefully inspect the chosen site for any signs of irritation, infection, or injury. Ensure the skin is intact, clean, and free from cuts, rashes, or bruises. Avoid areas with moles, scars, or tattoos, as they may affect the pod’s adherence or sensor accuracy.
What are the advantages of placing the Omnipod on the arm?
Placing the Omnipod on the arm offers easy access for monitoring and adjustments, and it can be easily concealed under clothing, providing discreetness. It is beneficial for individuals who prefer to keep their diabetes management private or wear clothing that exposes other areas of the body.
Are there any considerations for Omnipod placement on the arm?
The arm may not be the most stable location for Omnipod placement, especially for individuals who engage in rigorous physical activities or sports. Those with limited arm mobility or dexterity may find it challenging to insert or remove the pod independently.
What are the benefits of placing the Omnipod on the thighs?
Placing the Omnipod on the thighs offers increased stability and reduced interference during physical activities. The thigh area is less affected by external factors such as friction from clothing or tight spaces.
Top Selling Products

Featured Products


Write a comment
Your email address will not be published. All fields are required